Harry Roberts wrote a great article, Front-end performance for web designers and front-end developers, which details various techniques for improving page load times. One thing he skips over, though, is image optimisation. There are many ways to optimise images for loading performance, including using image sprites, icon fonts, and replacing bitmaps with SVGs. But whenever you have to use bitmap images you should also optimise them before they make it to the page.
In this article I want to show a few simple image optimisation techniques I use, which are aimed at reducing the filesize of the images, and therefore speeding up your page loading times.
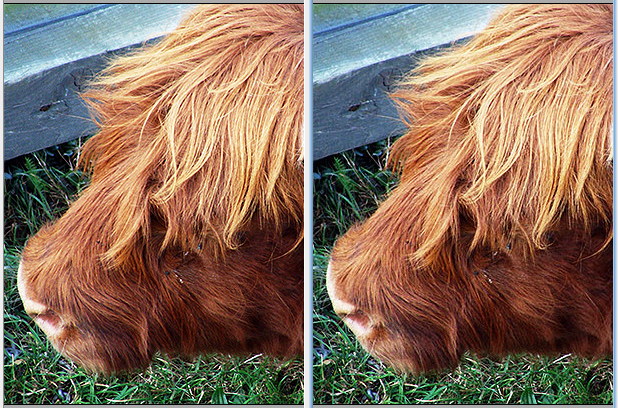
A former colleague taught me a little trick when saving JPEGs: you can often get away with reducing the quality of the image quite significantly without any noticeable drop in visual fidelity. And the lower the quality of the image, the smaller the file size. If you use Photoshop you can in many cases reduce the Quality setting to as little as 51% (this seems to be some kind of internal boundary). In the image below the photo on the right has Quality set to 51; I don’t know about you, but I can’t tell the difference.
You can’t do this as a blanket rule, however; it really depends on the image you’re working with. Large blocks of solid colour can be affected by compression artifacts, as you can see in the image below, most noticeably where the land meets the sky (click to open it at full size). So carefully check your images and adjust the quality as required.

If you’re considering HiDPI screens such as Apple’s Retina, you can drop the quality even lower; as the double-sized image will be resized to half of its size in the page, you can drop the Quality down to even the mid-30s, in some cases, without any discernible drop in quality. This leads to the incredible case of larger images with lower file sizes. You can read more about this in the post Retina revolution by Daan Jobsis.
The other thing you *must* do is run your images through an optimisation program. On the desktop the best I’ve ever found is Kornel Lesiński’s ImageOptim, a tremendous piece of freeware which runs a series of optimisations on images that you drag and drop onto it. This can lead to file size reductions of around 25% in many cases, and even up to 75% or 95% for smaller images. A Ruby script called image_optim will let you run this on the server rather than client side.
[…] Bitmap Image Optimisation (22 de enero, 2013) […]
Rendimiento | HTML + CSS [January 22nd, 2013, 11:42]
A good alternative to ImageOptim for Linux is Trimage: http://trimage.org/
I’ve found it delivers similar results.
Daniel [January 23rd, 2013, 14:24]